You have a part drawing in hand. It might be a bottle, a housing, or a refrigerator liner. The right manufacturing process depends entirely on the part’s design. Hollow parts are made by blow molding. Solid, complex parts are injection molded. And large, thin-walled open shells are vacuum formed. The three processes don’t compete on which is “better”—they each serve a different purpose.
Many buyers send a housing drawing to injection molders, blow molders, and vacuum formers, only to be told by all of them, “We can make this.” The quotes can differ by orders of magnitude, yet each supplier claims their method is the most suitable. In reality, these aren’t competing routes; they are specialized for different part geometries. An injection mold can cost from thousands to tens of thousands of dollars. A blow mold might be in the hundreds to thousands. A vacuum forming mold can be just a few hundred to a few thousand dollars. This massive difference in tooling cost isn’t about which process is superior. It’s about the part’s shape. If you choose the wrong process, even the best mold can’t save the project.
What Each Process Does
Injection molding: This process involves injecting molten plastic pellets under high pressure into a closed steel mold cavity. The plastic is packed in, cooled, and then ejected. Think of it like filling an ice cube tray with liquid plastic—it creates solid, complex parts.
Blow molding: First, plastic is extruded or injected into a tube-like shape called a parison (a pre-production blank). A mold closes around the parison, and compressed air is blown inside, inflating it against the mold cavity walls. It’s like blowing up a balloon inside a container, creating a hollow part.
Vacuum forming: A sheet of plastic is heated until it’s soft and pliable. A vacuum is then used to pull the sheet down over a mold surface. After it cools, the excess material is trimmed off. This is similar to using a vacuum to apply a screen protector, and it produces thin-walled shells.
These aren’t three ways to do the same job; they are three different jobs. Injection molding makes solid parts, blow molding makes hollow parts, and vacuum forming makes thin-shelled parts. You have to identify your part type first, then select the process.
Part Geometry Determines the Process
Identify the part geometry first to determine the process:
- Hollow containers (bottles, drums, cans, fuel tanks) → Use blow molding. Injection molding fills a closed cavity to create a solid part, so it can’t produce a geometry that is sealed on the outside, hollow on the inside, and has a narrow opening with a large body. Vacuum forming can’t create the narrow neck of a bottle.
- Solid or complex structural parts (housings, snap-fits, threads, inserts, gears, assembly holes) → Use injection molding. A blow mold only forms the outer surface of a part, so it can’t create features like snap-fits or threads. Vacuum forming can’t handle significant variations in wall thickness or produce precise assembly holes.
- Large, thin-walled open shells (refrigerator liners, automotive door panels, lightbox signs, trays) → Use vacuum forming. The tooling cost for an injection mold for parts this large would be prohibitive, and blow molding can’t produce an open-shelled part.
Trying to substitute one process for another across different part types will lead to failure. This isn’t just an industry saying. One engineer tried to make a fuel tank by injection molding two halves and welding them together. The weld seam became a systemic weak point, and the gas leakage failure rate was an order of magnitude higher than with a seamless blow-molded tank, not to mention the significantly higher cost. You can’t use a process designed to fill a solid cavity to make a hollow part. Another common mistake is using vacuum forming for low-volume housings to save on mold costs. An appliance manufacturer tried this for an air conditioner panel. The finished part lacked rigidity and warped after assembly, forcing them to switch back to injection molding. In vacuum forming, wall thickness is determined by how much the sheet is stretched, and corners tend to thin out. It’s not a suitable replacement for injection molding when it comes to load-bearing parts.
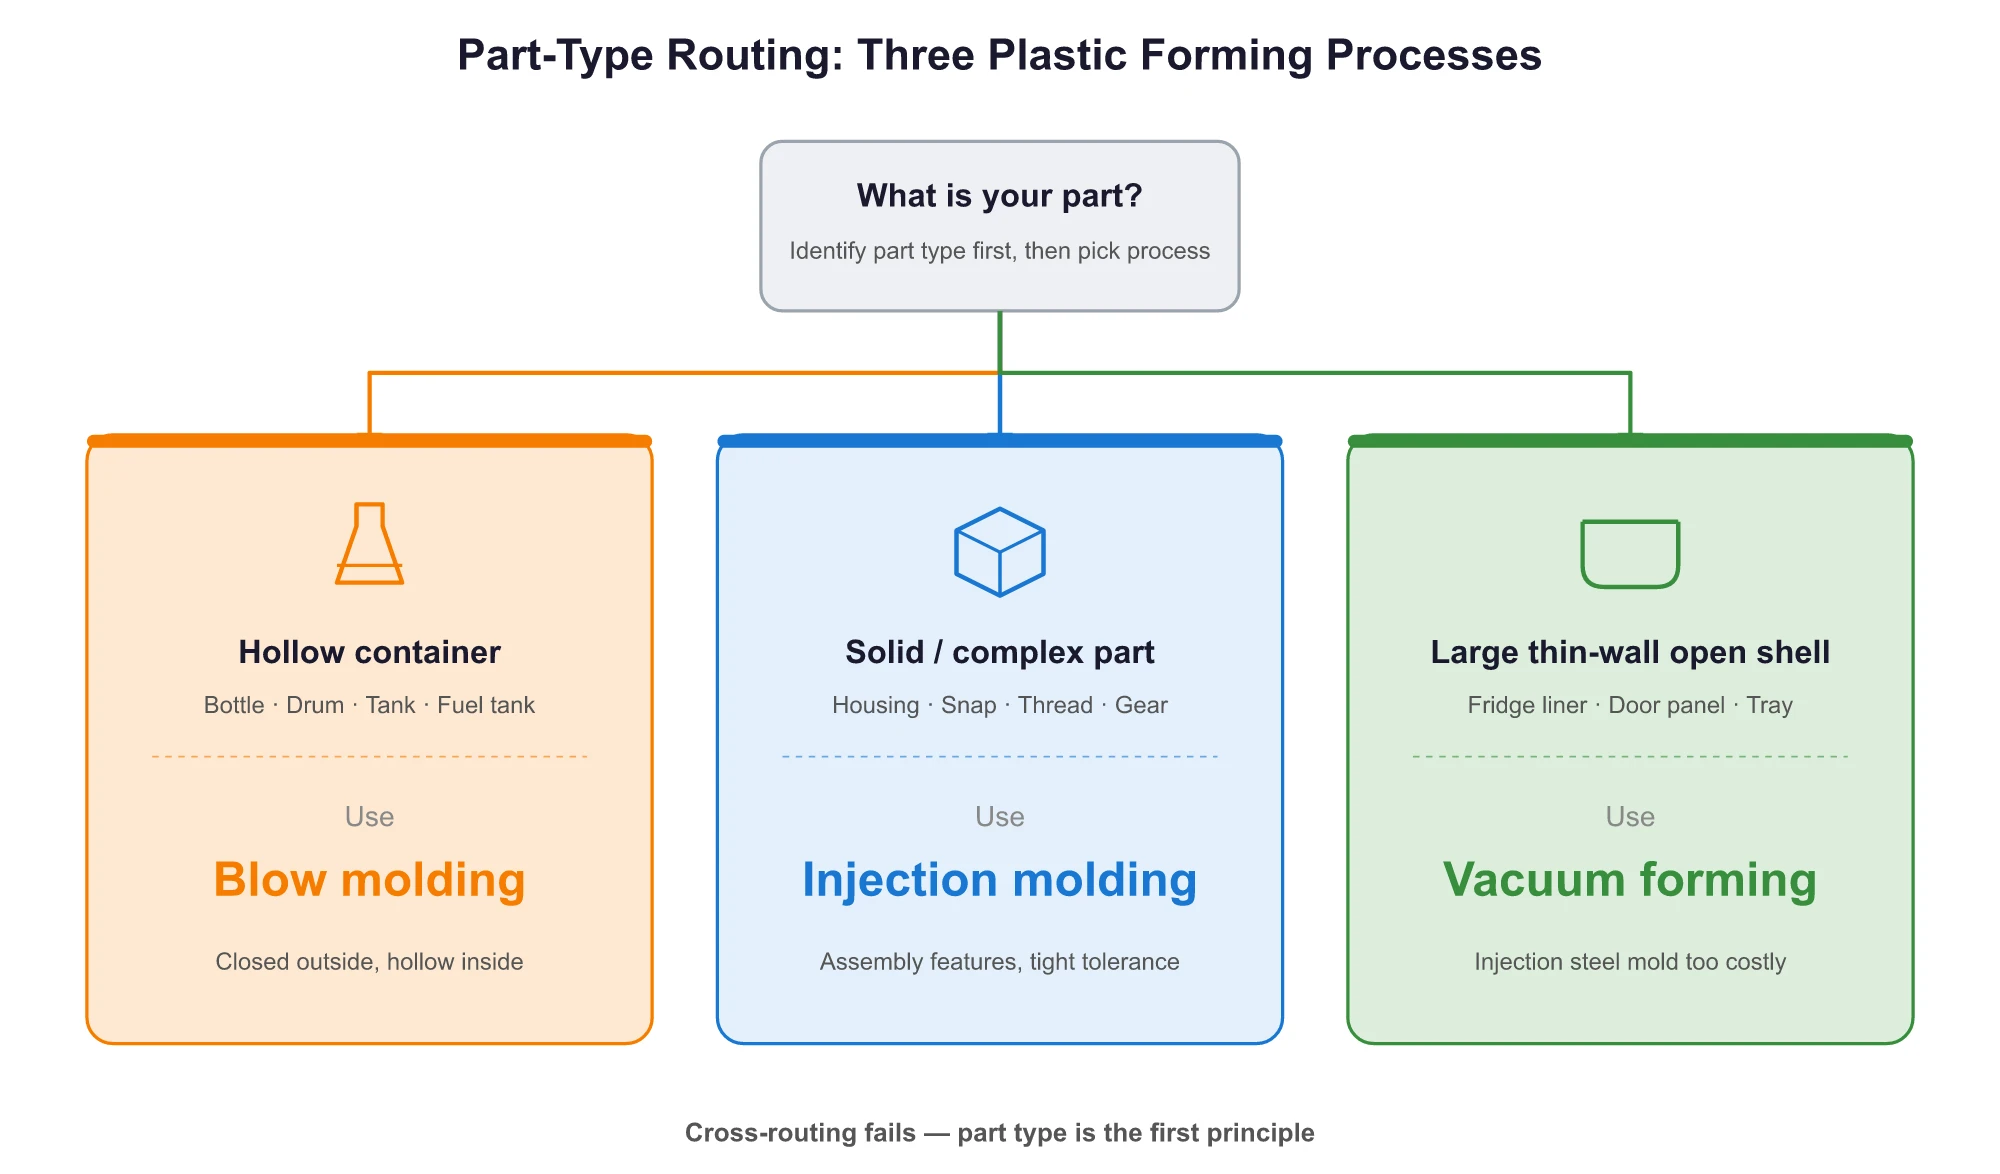
Comparing processes across different part types is meaningless. It’s all about finding the right fit for your specific geometry.
Core Differences at a Glance
Here’s a direct comparison of the core differences:
| Dimension | Injection Molding | Blow Molding | Vacuum Forming |
|---|---|---|---|
| Raw Material Form | Pellets | Pellets | Sheet |
| Tooling Cost Scale | Highest (closed steel mold) | Medium (half-mold) | Lowest (aluminum/resin mold, ~1/10th of injection) |
| Economic Order Quantity (EOQ) | ≥10,000 pcs | EBM ≥5,000 / IBM ≥50,000 pcs | 100–10,000 pcs |
| Tolerance Precision | Precision grade ±0.005–0.02 mm | General grade | General grade ±0.1–0.3 mm |
| Typical Parts | Housings/panels/snap-fit parts | Bottles/drums/fuel tanks | Refrigerator liners/trays |
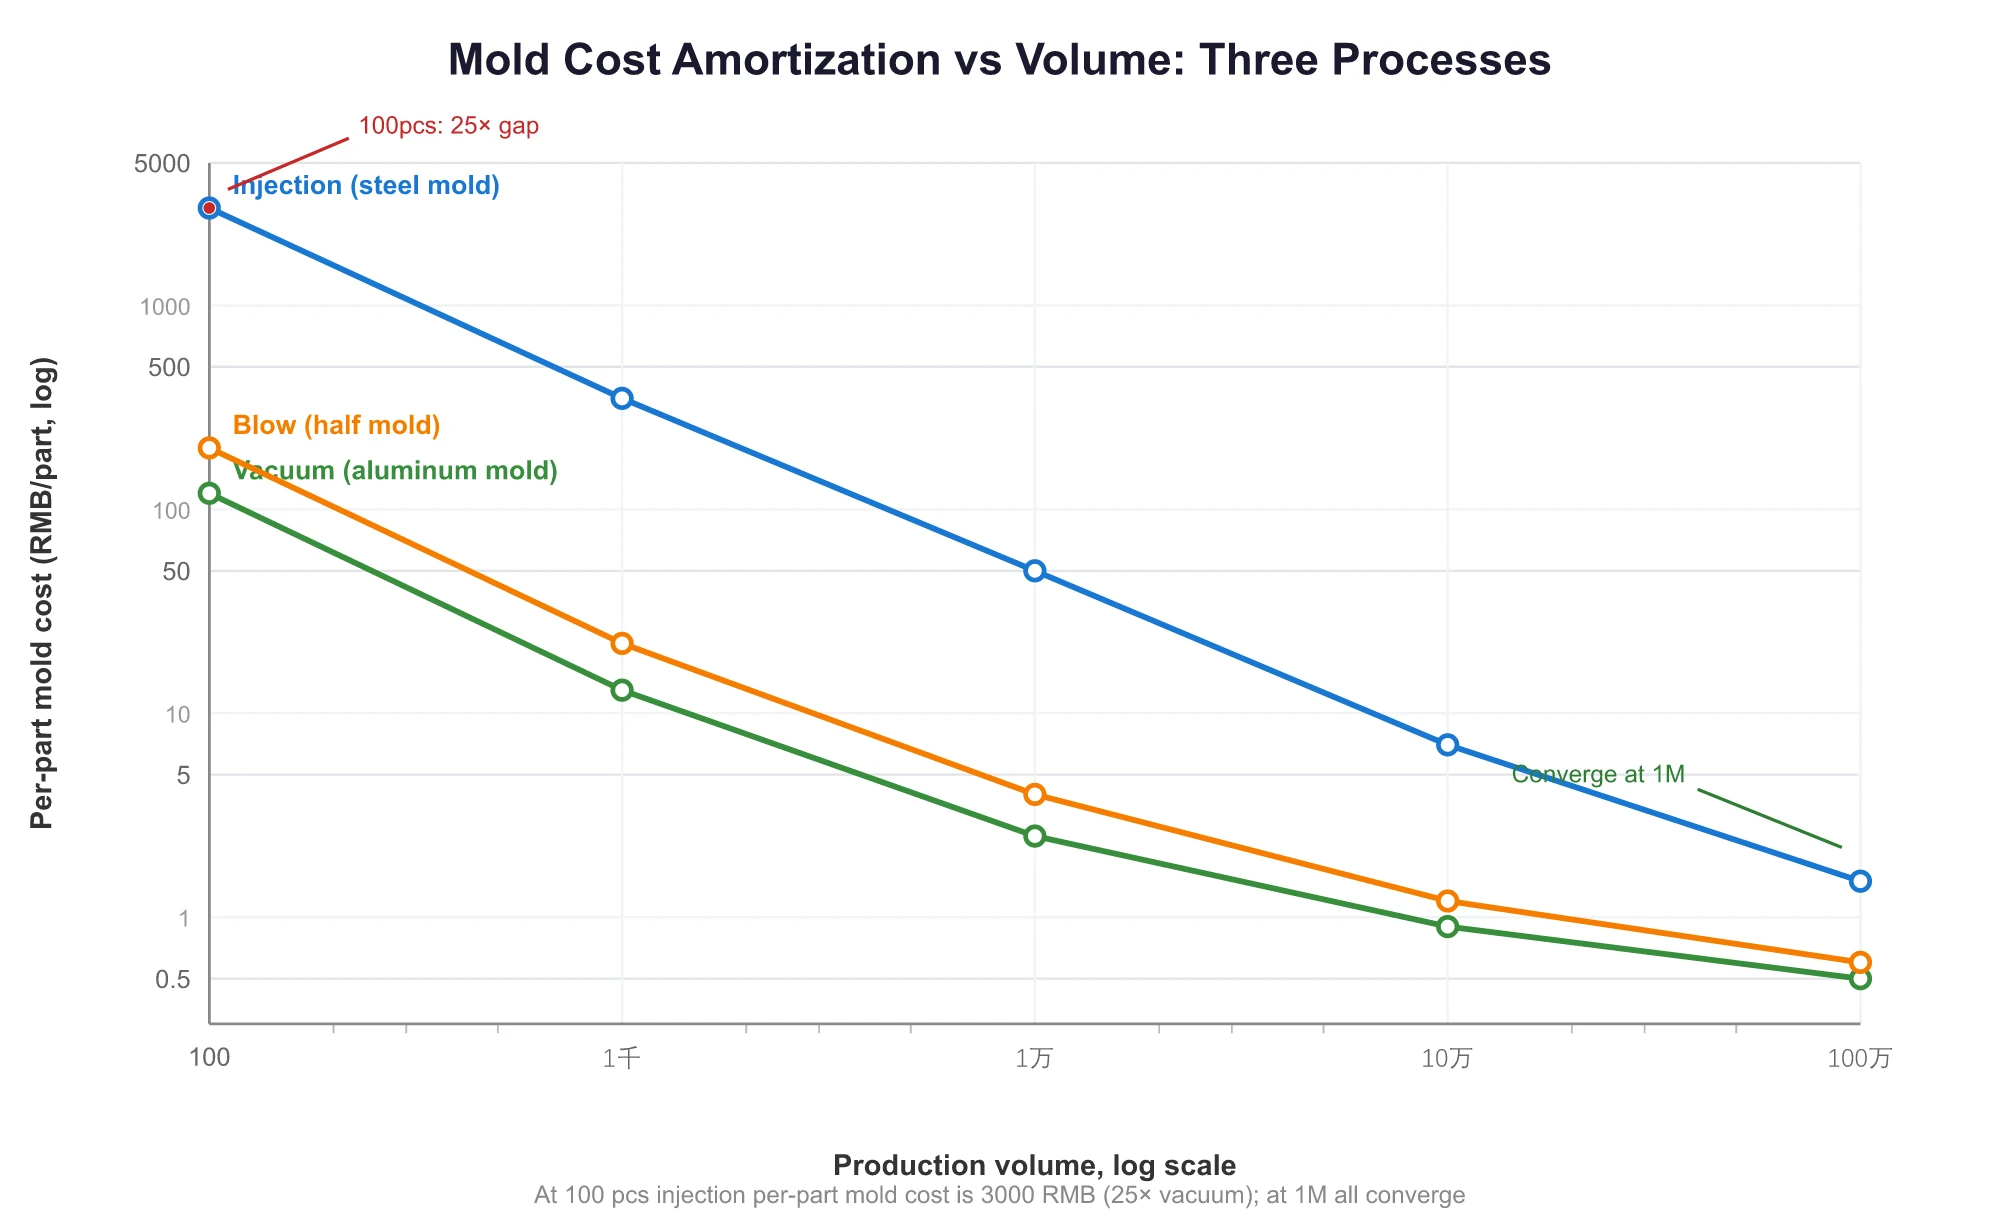
The exact tooling cost varies greatly with complexity, but in terms of scale, steel injection molds are the most expensive. A vacuum forming mold can cost as little as one-twentieth of that because it doesn’t require a closed steel cavity; an aluminum or resin mold is sufficient. The economic order quantity (EOQ) is the minimum number of parts needed to amortize the mold cost to a reasonable per-part price. With a vacuum forming mold costing only a few hundred dollars, you can break even with just a few hundred parts. In contrast, a steel injection mold can cost tens of thousands of dollars, making production runs under 10,000 pieces unprofitable. The cost advantage of high-volume injection molding comes from spreading that tooling cost out—over 100,000 parts, it might be a few cents per part; over a million, it’s a fraction of a cent.
Tolerance is another key factor. Parts requiring high assembly precision and tight fits must be injection molded. Neither blow molding nor vacuum forming can achieve precision-grade tolerances.
Injection Molding: The Go-To for Solid, Complex Parts
What injection molding can do: create snap-fits, threads, inserts, gears, deep holes, thin walls, and complex undercuts (using slides and lifters). What it can’t do: make hollow parts. Housings for consumer electronics, appliance panels, automotive bumper components, power tool housings, connectors, and bottle caps—all these solid, complex parts with structural, load-bearing, and precision requirements are made with injection molding.
On the process side, typical parameters include a melt temperature of 180–300 °C, injection pressure of 70–150 MPa (even higher for thin-wall parts), holding pressure of 50–120 MPa, and a mold temperature of 40–120 °C, with cycle times from 15 to 60 seconds. All these parameters work toward one goal: to pack molten plastic tightly into the steel mold cavity. Injection molding can achieve precision tolerances of ±0.005–0.01 mm, the highest of the three processes.
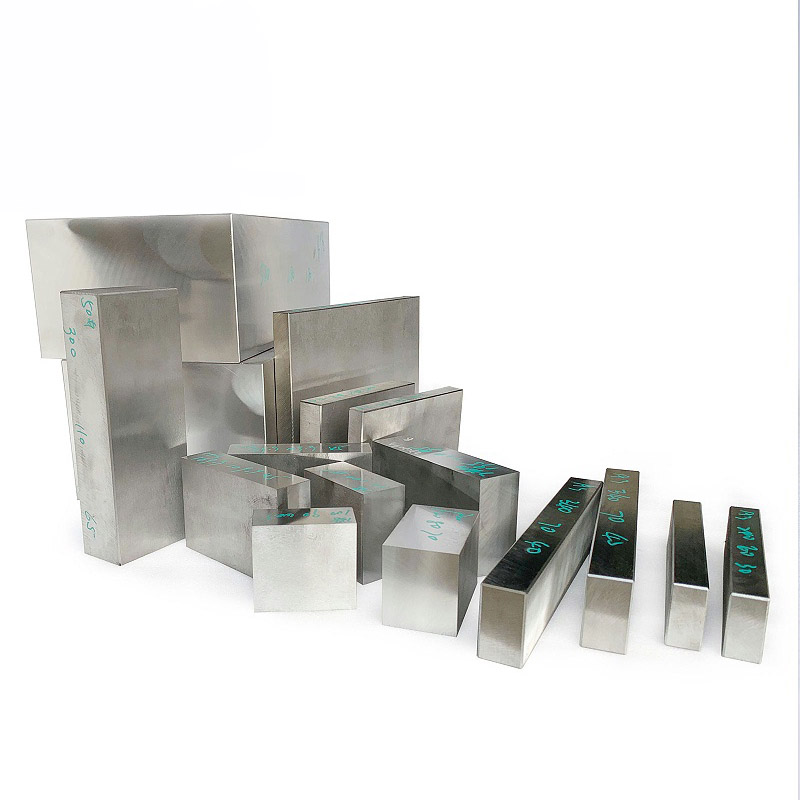
Mold steel is chosen based on required tool life: aluminum for 5,000–25,000 parts (low-volume prototypes), P20 pre-hardened steel for 250,000–750,000 parts (mainstream production), and H13 hardened steel for 1–2 million parts (high-volume, long-life tools). This is the selection logic we use at moldsteells for daily orders. The economic order quantity starts at 10,000 pieces, with the break-even point for tooling cost typically falling between 3,000 and 6,000 pieces. Below that, a steel injection mold isn’t cost-effective.
At moldsteells, our specialty is injection molding. We excel at two-shot molds (for molding two colors or materials in one cycle), mirror-finish injection molds (using Sodick mirror-finish EDM machines and rapid heat cycle molding to produce high-gloss parts directly from the mold), and thin-wall molds (for packaging containers and structural components in consumer electronics).
Blow Molding: A Must for Hollow Containers
What blow molding can do: create hollow parts like bottles, drums, cans, fuel tanks, air ducts, and stadium seats. What it can’t do: create snap-fits, threaded inserts, or precision assembly holes. A blow mold only forms the part’s outer surface; the inner cavity is formed by air pressure, making it impossible to create internal features.
The process can be broken down into three main types:
- Extrusion Blow Molding (EBM): A tubular parison is continuously extruded, captured by a closing mold, and inflated. Industrial drums, detergent bottles, and automotive fuel tanks are made with EBM. A key identifier is the seam line at the bottom of the part. The main process challenge in EBM is parison sag, where the weight of the molten plastic stretches the parison, making the top wall thinner and the bottom thicker. For a material like unmodified polypropylene, this wall thickness variation can exceed 30%.
- Injection Blow Molding (IBM): This process starts by injection molding a parison onto a core rod, which is then inflated. It produces highly accurate bottle neck threads in a single step with no flash (excess material that seeps out at the parting line). Pharmaceutical bottles, cosmetic containers, and roll-on deodorant balls are typical IBM products.
- Injection Stretch Blow Molding (ISBM): A parison is injection molded, then reheated and biaxially stretched before being inflated. This is how PET water bottles and carbonated drink bottles are made. The process yields the highest clarity and strength, and a telltale sign is the distinct injection gate point on the bottom of the bottle.
Although IBM and ISBM have “injection” in their names, they are blow molding processes, not injection molding processes. The parison is indeed made using injection molding, but the overall process is classified as blow molding because it involves a subsequent inflation step to create a final hollow part.
Blow pressure is typically 0.3–0.7 MPa, with cycle times of 10–30 seconds. Molds are usually aluminum or steel half-molds, with a moderate tooling cost.
Vacuum Forming: The Most Economical for Large, Thin-Walled Shells
What vacuum forming can do: create large, thin-walled open shells like refrigerator liners, automotive interior door panels, lightbox signs, luggage shells, and packaging trays. What it can’t do: produce parts with significant wall thickness variations, parts with a draw ratio greater than 1:1, load-bearing structural components, or precision assembly holes. The raw material for vacuum forming must be a sheet (e.g., PVC, PS, PP, ABS, PET, with thin-gauge forming from 0.14–5 mm and thick-gauge forming >2 mm), not pellets. This fundamental requirement limits it to producing relatively uniform, thin-walled shells.
Vacuum forming has two sub-routes: using a male mold or a female mold. With a male mold (a convex shape), the plastic shrinks onto the mold, resulting in an accurate outer surface. This is used when the exterior texture is critical, like on an automotive interior panel. With a female mold (a concave shape), the plastic shrinks away from the mold for easy ejection, resulting in an accurate inner surface. This is used when internal dimensions are critical, like for a refrigerator liner.
The process requires a vacuum level greater than 0.08 MPa, sometimes assisted by 0.3–0.6 MPa of positive air pressure, with cycle times of 5–20 seconds. Tooling cost is the lowest of the three—often just one-tenth that of an injection mold. Aluminum molds can be delivered in 3–5 days, making it the most economical choice for small batches. However, its material utilization is the lowest of the three processes due to high trimming waste (though the scrap can be recycled).
How to Choose? A Four-Point Checklist
When you have a new part drawing, review it from these four angles:
- Part Geometry: Hollow parts go to blow molding. Solid, complex parts go to injection molding. Large, thin-walled open shells go to vacuum forming. This is the fundamental rule; trying to substitute across these categories will lead to failure.
- Production Volume: For low-volume thin-walled parts (under 1,000 pieces), vacuum forming is the most economical due to its fast and cheap aluminum tooling. For high volumes (over 10,000 pieces), injection molding offers the lowest per-part cost. For high-volume hollow parts, IBM or ISBM are the best choices.
- Material: Pellets (ABS, PP, PC, PA, POM, PE) are used for injection molding or blow molding. Sheets are required for vacuum forming. The material’s form factor is a key determinant.
- Tolerance: For precision-grade tolerances (±0.005–0.02 mm), choose injection molding. For general-grade tolerances (±0.1–0.3 mm), blow molding or vacuum forming will suffice. Parts that require high assembly accuracy and tight fits must be injection molded.
By cross-referencing these four points, you can almost always determine the right process.
We are moldsteells, a company specializing in precision mold manufacturing. If you’re still unsure which process is right for your part, or if you need an evaluation report or a DFM analysis to assess project feasibility, send us your drawings or samples. We’d be happy to take a look and provide you with a professional plastic mold making solution.
Part geometry determines the process; comparing them outside this context is meaningless. Classify your drawing by its geometry: if it’s a bottle, use blow molding; if it’s a housing, use injection molding; if it’s a refrigerator liner, use vacuum forming. It’s that straightforward. Choose the wrong process, and even the best mold won’t save your project.