1. NAK80 Mold Steel Selection Guide
Purchasing teams often face three core challenges when selecting NAK80: they are unclear about its application differences compared with other plastic mold steels such as P20 and 718H, they do not fully understand how pre-hardened hardness and polishing performance match real production needs, and the market contains counterfeit products that make it difficult to distinguish authenticity and quality grades.
This content is compiled from Moldsteels’ practical experience in customized mold steel supply and machining projects. It is designed to address these pain points: using a selection logic framework to quickly assess whether NAK80 is suitable for specific mold scenarios, building a basic understanding of its properties to grasp key characteristics, and guiding quality verification during the purchasing process to reduce procurement risks and improve decision-making efficiency.
2. Overview of NAK80 Mold Steel Properties and Chemical Composition
2.1 Property Parameters
| Parameter | Range | Unit | Description |
|---|---|---|---|
| Hardness | 37–43 | HRC | Pre-hardened condition, no secondary heat treatment required, based on multiple data sources |
| Tensile strength | 880–1000 | MPa | Room-temperature mechanical property range based on multiple sources |
| Yield strength | 780–900 | MPa | Room-temperature yield limit, critical value for plastic deformation |
| Impact toughness | 35–48 | J/cm² | Measured at 20 °C, reflecting resistance to impact fracture |
| Surface roughness | ≤ 0.02 | µm | Surface finish after polishing; the lower the Ra value, the smoother the surface |
| Dimensional stability | ≤ 0.03% | % | Dimensional change rate after machining, ensuring mold dimensional stability |
2.2 Chemical Composition
| Element | Range | Description |
|---|---|---|
| C (Carbon) | 0.17–0.26% | Basic strengthening element, balancing hardness and toughness |
| Cr (Chromium) | 1.15–1.65% | Improves corrosion resistance and polishability, refines grain size |
| Mo (Molybdenum) | 0.18–0.42% | Refines microstructure and improves tempering stability |
| Mn (Manganese) | 0.45–0.85% | Improves hardenability and supports mechanical strength |
| Si (Silicon) | 0.15–0.45% | Acts as a deoxidizer, enhances strength and wear resistance |
| S (Sulfur) | ≤ 0.015% | Low sulfur content reduces inclusions and ensures polishing performance; low-sulfur versions can be controlled to ≤ 0.01% |
| P (Phosphorus) | ≤ 0.025% | Controlled to reduce brittleness and ensure service safety |
| Ni (Nickel) | 3.00–3.50% | Key element for toughness, improving impact resistance and stability in the pre-hardened condition |
| Cu (Copper) | 0.80–1.20% | Improves polishability and corrosion resistance |
In summary, NAK80 is a pre-hardened plastic mold steel with excellent mirror polishing performance. After polishing, surface roughness can reach Ra ≤ 0.01 µm (mirror grade). It can be machined directly without secondary heat treatment and is suitable for molds requiring high precision and high surface quality. Its low-carbon design, combined with alloying elements such as Cr, Ni, Mo, and Cu, achieves a good balance between hardness (HRC 37–43) and toughness (35–48 J/cm²), while also providing excellent machinability and corrosion resistance.
3. Advantages of NAK80 Mold Steel
3.1 Pre-Hardened Supply Performance
| Parameter | Value | Description |
|---|---|---|
| Delivery hardness | HRC 37–43 | No secondary heat treatment required, based on multiple data sources |
| Hardness variation within same plate | ≤ 2 HRC | Ensures hardness uniformity |
| Hardness fluctuation through thickness | ≤ 3 HRC | Stable properties across thickness |
| Production lead-time reduction | 20–30% | Suitable for quick delivery of mass-production molds |
3.2 Mirror Polishing Performance
| Parameter | Value | Description |
|---|---|---|
| Surface roughness | Ra 0.015–0.02 µm | Achieves mirror-grade polishing |
| Polishing time reduction | 40–50% | Improves efficiency for high-appearance molds |
| Polishing consumables reduction | 30% | Reduces polishing-related costs |
3.3 Machinability
| Parameter | Value | Description |
|---|---|---|
| Milling speed | 120–150 m/min | Higher cutting efficiency than conventional mold steels |
| Tool life extension | High-speed steel +40%, carbide +30% | Reduces tool change frequency |
| Machining cost reduction | 15–20% | Lowers manufacturing cost for complex cavity molds |
3.4 Microstructural Stability
| Parameter | Value | Description |
|---|---|---|
| Carbide distribution uniformity | ≥ 90% | Ensures uniform microstructure |
| Long-term dimensional change | ≤ 0.02 mm/m | Ensures stable molding dimensional accuracy |
4. Limitations of NAK80 Mold Steel
4.1 Material Cost Comparison
| Parameter | Value | Description |
|---|---|---|
| Material cost | 30–50% higher than P20 | Higher cost share for small- and medium-volume projects |
4.2 High-Temperature Performance
| Parameter | Value | Description |
|---|---|---|
| Long-term service temperature | ≤ 120 °C | Exceeding this can lead to surface softening and collapse |
4.3 Wear Resistance Level
| Parameter | Value | Description |
|---|---|---|
| Pre-hardened hardness | HV 370–400 | Not suitable for molding plastics with ≥ 15% glass fiber |
5. Typical Mold Types for NAK80 Mold Steel
5.1 Mirror-Polished Molds
Suitable for: Acrylic lamp covers, PC optical lenses, LED light guides, camera lens elements, etc.
Recommended reasons: NAK80 offers high cleanliness with few non-metallic inclusions and excellent polishing performance, achieving mirror surfaces at Ra 0.01–0.02  µm. It meets the stringent surface finish requirements of optical-grade plastic parts and produces molded components with no weld lines and no orange-peel.
Actual result: An optical company used NAK80 to manufacture PC lens molds. After polishing, the mirror quality remained stable, and the product pass rate increased to 99.2%.
5.2 High-Gloss Appearance Part Molds
Suitable for: Automotive instrument panel fascias, home appliance control panels (such as refrigerator/washer control panels), high-end mobile phone housings, etc.
Recommended reasons: NAK80 features uniform surface hardness (HRC 37–43). After fine machining, surface roughness is low (Ra ≤ 0.05 µm), and molded parts can reach gloss levels above 90°. This reduces the need for secondary surface treatments such as painting or electroplating, lowering cost and improving efficiency.
Actual result: An automotive mold manufacturer adopted NAK80 for instrument panel molds. The gloss of molded parts reached 92° in one shot, and surface treatment labor time was reduced by 30% compared with traditional mold materials.
5.3 Precision Structural Component Molds
Suitable for: Medical connectors (such as IV line connectors), electronic connectors (such as USB-C housing components), micro gears (such as printer drive gears), etc.
Recommended reasons: NAK80 is supplied in a pre-hardened condition (no quenching and tempering required) and exhibits excellent dimensional stability after machining. With a low coefficient of thermal expansion (about 11.5 × 10⁻⁶/°C between 20–100 °C), it can meet the ±0.005 mm tolerance requirements for precision parts. Long-term mold deformation is less than 0.01 mm.
Actual result: A medical mold manufacturer used NAK80 for IV connector molds. After continuous production of 100,000 shots, cavity dimensional deviation was only 0.003 mm, and the product pass rate reached 98.5%.
5.4 Small- and Medium-Batch Molds
Suitable for: Customized home appliance components (such as smart home control panels), small-batch automotive parts trial runs (such as EV charging port components), and molds for cultural and creative products (high-end toy housings), etc.
Recommended reasons: NAK80 is supplied pre-hardened (HRC 37–43) and can be directly milled and engraved, eliminating quenching and tempering steps. This shortens mold manufacturing lead time by 30–40% and is suitable for small- and medium-batch production of 10,000–50,000 shots, balancing cost and delivery time.
Actual result: A mold shop used NAK80 to customize a smart home control panel mold (batch size of 30,000 pieces). From design to production, the cycle was only 15 days—10 days shorter than with traditional molds.
5.5 Transparent Plastic Part Molds
Suitable for: Transparent beverage preform molds, optical lenses (such as reading glasses lenses), transparent cosmetic packaging boxes, etc.
Recommended reasons: NAK80 offers excellent mirror polishing performance and low sulfur content (standard ≤ 0.015%, low-sulfur versions ≤ 0.01%), reducing surface defects such as pinholes and blowholes on the mold. This ensures light transmittance of transparent plastic parts above 90%, avoids optical distortion, and enhances product competitiveness.
Actual result: A packaging company used NAK80 to produce PET transparent preform molds. Light transmittance of the molded parts reached 92%, about 5% higher than molds made with S50C steel, and customer complaint rates dropped by 60%.
6. Most Recommended Product Types for NAK80 Mold Steel
6.1 Optical-Grade Transparent Part Molds (LED Light Guides)
| Parameter | Value | Description |
|---|---|---|
| Application scenario | LED light guides | High-precision optical injection-molded components |
| Recommended reasons | High polishing performance; after polishing, surface roughness can reach Ra ≤ 0.01 µm (mirror-grade); low inclusion content (non-metallic inclusions ≤ 0.005%) | Meets stringent mirror-surface requirements of light guides and ensures uniform light transmission |
| Actual result | Product light transmittance increased to 92.3%, and the production pass rate rose from 88% to 99.2% | Compared with P20 steel molds, both optical performance and production stability were significantly improved |
| Comparative advantage | Mold life extended by 50% (from 500,000 shots to 750,000 shots) | Compared with P20 molds, combines optical accuracy with mold durability |
6.2 Medical-Grade Plastic Molds (Medical Connectors)
| Parameter | Value | Description |
|---|---|---|
| Application scenario | Medical connectors | Precision plastic parts for medical devices |
| Recommended reasons | Pre-hardened condition without heat treatment (compatible with ISO 13485 medical device quality management standard) | Avoids oxide and decarburized layers from heat treatment, meeting cleanliness requirements of medical products |
| Actual result | Particulate contamination per piece decreased by 90% (from 0.5;mg/piece to 0.05 mg/piece), and bacterial endotoxin test pass rate increased from 92% to 99.5% | Significantly improves the biosafety of medical products |
| Comparative advantage | Material cost reduced by 25%, machining lead time shortened by 30% (from 15 days per mold set to 10.5 days) | Compared with S136, it maintains cleanliness while lowering overall cost |
6.3 High-End Home Appliance Appearance Molds (Refrigerator Control Panels)
| Parameter | Value | Description |
|---|---|---|
| Application scenario | Refrigerator control panels | High-gloss appearance parts for home appliances |
| Recommended reasons | After mirror polishing, surface roughness reaches Ra 0.02 µm and hardness distribution is uniform (hardness variation ≤ 2 HRC) | Meets requirements for high-gloss appearance (gloss ≥ 95 GU) and weld-line-free surfaces of refrigerator panels |
| Actual result | Surface defect rate (sink marks, flow lines) dropped from 12% to 3%, and one-shot molding pass rate reached 98.5% | Per-piece panel manufacturing cost decreased by 15% |
| Comparative advantage | Mold life increased by 2× (from 300,000 shots to 900,000 shots) | Compared with 45# steel molds, combines appearance quality with mold durability |

7. NAK80 Size Selection: Matching Product Size → Mold Size → Steel Block Size
Case 1: Size Selection for LED Light Guide Plates
| Item | Small (for phones/tablets) | Medium (for TVs) |
|---|---|---|
| Product size | 80 × 50 × 2.5 mm ± 0.1 mm (≤ 100 mm × 80 mm, 2–4 cavities) | 300 × 200 × 4 mm ± 0.2 mm (> 100 mm × 80 mm, 1 cavity) |
| Mold cavity size calculation | (80 × 50 × 2.5) × (1 + 0.4%) + runner space (add about 18 mm per side) | (300 × 200 × 4) × (1 + 0.4%) + runner space (add about 18 mm per side) |
| Deriving mold size and steel size (machining allowance) | Cavity margin 15–20 mm per side; mold base margin 10–15 mm per side (standard for small parts) | Cavity margin 20–25 mm per side; mold base margin 15–20 mm per side (standard for medium parts) |
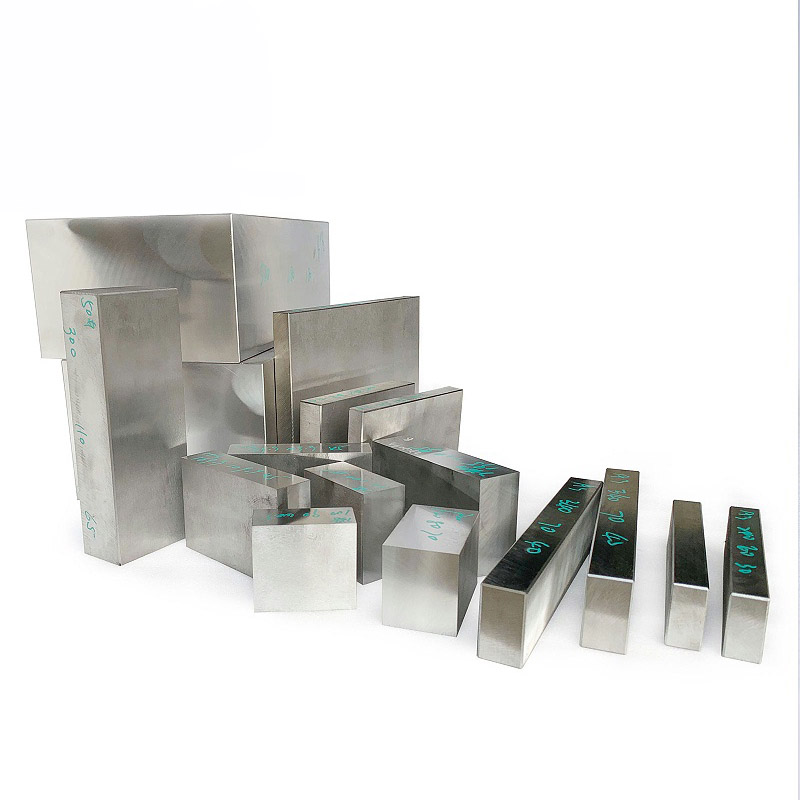
| Recommended NAK80 steel size | 200 × 150 × 50 mm block (for 2–4 cavity molds) | 350 × 350 × 80 mm block (for 1 cavity mold) |
| Special requirements for pre-hardened machining | Control machining allowance at 18–22 mm per side to avoid stress deformation | Control machining allowance at 20–25 mm per side to avoid stress deformation |
Case 2: Medical Connector Size Selection
| Item | Precision type (IV tube connector) | Large connector housing (monitor interface) |
|---|---|---|
| Product size | 15 × 12 × 8 mm ± 0.05 mm (≤ 20 × 15 mm, 4 cavities) | 30 × 20 × 10 mm ± 0.1 mm (> 20 × 15 mm, 2 cavities) |
| Mold cavity size calculation | (15 × 12 × 8) × (1 + shrinkage: PC 0.6% / PP 1.0%) | (30 × 20 × 10) × (1 + shrinkage: PC 0.6% / PP 1.0%) |
| Deriving mold size and steel size (machining allowance) | Cavity margin 18 mm per side; mold base margin 12 mm per side | Cavity margin 22 mm per side; mold base margin 12 mm per side |
| Recommended NAK80 steel size | 120 × 100 × 40 mm plate (for 4 cavity molds) | 200 × 180 × 60 mm block (for 2 cavity molds) |
| Special requirements for pre-hardened machining | After rough machining, leave 5 mm semi-finish allowance and allow 24 hours of natural aging before finishing | After rough machining, leave 5 mm semi-finish allowance and allow 24 hours of natural aging before finishing |
Case 3: Refrigerator Control Panel Size Selection
| Item | Single-door refrigerator panel | Side-by-side refrigerator panel (with inserts) |
|---|---|---|
| Product size | 350 × 120 × 5 mm ± 0.3 mm (1 cavity) | 500 × 200 × 8 mm ± 0.5 mm (1 cavity, cavity length > 500 mm) |
| Mold cavity size calculation | (350 × 120 × 5) + runner space (add about 25 mm per side, including hot runner) | (500 × 200 × 8) + runner space (add about 25 mm per side, including hot runner) |
| Deriving mold size and steel size (machining allowance) | Cavity margin 20–25 mm per side; mold base margin 15–20 mm per side | Two blocks assembled; joint line distance from cavity edge ≥ 30 mm; reserve 5 mm machining allowance per side at the joint |
| Recommended NAK80 steel size | 350 × 350 × 80 mm block (single block for 1 cavity mold) | 300 × 300 × 120 mm × 2 blocks (assembled, H7/h6 alignment pin fit) |
| Special requirements for pre-hardened machining | Control flatness at ≤ 0.02 mm/m to reduce assembly deviation | After assembly, keep at 60 °C for 4 hours to relieve stress; contact surface flatness ≤ 0.02 mm/m |
8. How to Identify Genuine NAK80 Mold Steel: Purchasing Pitfall Guide
8.1 Common Counterfeiting Methods
P20 impersonating NAK80: P20 steel (without Ni and Cu elements) is used to impersonate NAK80. Although the appearance is similar, polished surfaces tend to show pinholes and the hardness is lower than HRC 30 (while genuine NAK80 in pre-hardened condition is HRC 37–43).
Re-melted scrap: Scrap material is re-melted, leading to uneven composition (Cr and Ni fluctuations exceeding ±0.5%). Hardness differences within the same plate can exceed 5 HRC, with local soft spots.
8.2 Test Methods
Spectral composition analysis: Use a handheld spectrometer to measure C, Cr, Ni, Mo, and Cu contents. Standard ranges for NAK80 are: C 0.15–0.25%, Cr 1.20–1.80%, Ni 3.00–3.50%, Mo 0.20–0.50%, Cu 0.80–1.20%. Element fluctuations within the same batch should be ≤ ±0.1%. Typical test cost is approximately $30–$45.
Hardness measurement: Use a Rockwell hardness tester (HR-150A). Before testing, grind 2–3 mm off the surface to remove any quenched layer. Measure at least three points on the same plate (distributed along the diagonals). Pre-hardened NAK80 hardness should be HRC 37–43, with a hardness variation of ≤ 5 HRC within the same plate. Typical test cost is about $30–$45.
Metallographic analysis: Send samples for microstructural examination. New NAK80 material should show uniform tempered sorbite (no network carbides or sulfide inclusions), and carbide rating should be ≤ Level 2. The typical test cost is about $170 per sample.
Visual and marking inspection: Check that the surface is free from gray-black/dark-red scale and dense porosity. Verify steel stamps and certificates (including heat number and composition data). This normally adds no extra cost.
8.3 Purchasing Recommendations
Supplier qualification: Verify the business license (including “mold steel sales” in its scope) and ISO 9001 certification. Request original mill certificates (with composition/hardness data) and third-party test reports from organizations such as SGS or CTI
Contract terms: Clearly specify “NAK80 (complying with JIS G4404-2006)” in the contract, and agree on pre-hardened hardness HRC 37–43 and Ni ≥ 3.0%. The contract should require sampling at least 5% of the batch upon receipt and specify that, if a counterfeit grade is found, the supplier must pay a penalty equal to three times the contract amount.
9. Frequently Asked Questions About NAK80 Mold Steel (FAQ)
What is the standard pre-hardened hardness of NAK80? Can it be increased through heat treatment?
The standard pre-hardened hardness of NAK80 is HRC 37–43 in the delivery condition, with hardness uniformity within ±1 HRC. Because its carbon content is relatively low (about 0.15%), secondary quenching provides only a limited increase in hardness, reaching about HRC 45–47. Forced quenching will reduce toughness by more than 30% and significantly increase the risk of mold cracking. If higher surface hardness is needed locally, surface nitriding is recommended, which can raise surface hardness to HV 600–800 with a hardened layer depth of 0.1–0.3 mm.
What is the typical market price range of NAK80? What factors affect its price?
Prices vary with market conditions, purchase volume, and specifications, so it is recommended to contact Moldsteells for real-time quotations. The main influencing factors include: origin (Japanese imported NAK80 is 30–50% more expensive than material made in China), size (thick plates with thickness > 100 mm typically have a 15–20% premium), processing condition (ground plates are 20–30% more expensive than as-rolled stock), raw material fluctuations (for every approximately $1,430 per ton change in nickel price, the price of NAK80 usually changes by about $70–$115 per ton), and seasonal patterns (Q4 is a procurement peak season, during which prices typically increase by 5–8% quarter-on-quarter).
Which is better for mirror-finish molds, NAK80 or S136? What are their key differences?
NAK80 is better suited to medium-volume, high-mirror molds, while S136 is better for corrosive environments or large-volume production. The key differences are:
- Pre-hardened condition: NAK80 is delivered pre-hardened at HRC 37–43 and can be machined directly. S136 requires quenching and tempering to HRC 50–55, and heat treatment is needed after machining.
- Polishing performance: NAK80 offers 20–30% higher polishing efficiency than S136 and can also achieve mirror finishes (Ra ≤ 0.01 µm), thanks to its low non-metallic inclusion content (≤ 0.005%).
- Corrosion resistance: S136 contains about 13% chromium and can withstand more than 500 hours in salt spray testing, whereas NAK80, with about 1.5% chromium, typically withstands around 100 hours and is not suitable for corrosive plastics such as PVC..
- Service life in shots: NAK80 is suitable for 100,000–500,000 shots, while S136 is suitable for > 1,000,000 shots. Mold life with S136 can be more than 30% longer than with NAK80.
What are the recommended polishing parameters for NAK80 (such as sandpaper grit and polishing compound type)?
Recommended polishing parameters for NAK80 are:
- Sandpaper grit: Follow a “step-by-step increase” principle: rough grinding (240# → 400# → 800#) followed by fine grinding (1200# → 2000#). Avoid skipping grits to prevent residual scratches.
- Polishing compound: For fine polishing, use diamond paste (grain size W1.5–W0.5) with a wool wheel, keeping spindle speed at 1,500–2,000 rpm.
- Temperature control: Mold surface temperature during polishing should be kept below 50 °C. It is recommended to cool every 30 minutes to avoid oxidation layers that degrade the mirror finish.
- Defect handling: If orange peel appears, check the polishing direction (a single, consistent direction is recommended) and revert to a finer sandpaper grit for re-grinding.
What is the usual minimum order quantity for NAK80, and what are typical delivery times?
Minimum order quantities and delivery times for NAK80 vary by supplier, specifications, and season. It is advisable to confirm details directly with suppliers. In general, thick plates (thickness > 100 mm) or special processing conditions (such as ground plates) may have minimum order requirements, and delivery times are significantly affected by the quarter, with Q4 peak-season purchases typically extending lead times by 3–5 days.
- When purchasing, prioritize suppliers that can provide spectrographic test reports and pay special attention to Ni (3.00–3.50%) and Cu (0.80–1.20%) contents.
- For thick plates (> 100 mm), request ultrasonic test reports to avoid internal shrinkage cavities or cracks.
- Before machining pre-hardened stock, measure hardness to ensure that hardness variation within the same plate is ≤ 2 HRC, thereby avoiding local soft spots that can affect polishing results.


